The high wind tables in the TRI Concrete & Clay Roof Tile Installation Guide can be intimidating at first glance. A recent “Ask the Expert” response by TRI President and Technical Director Rick Olson describes how to use the tables to determine fastening requirements.
QUESTION
“Oklahoma is considering going to a 115mph wind zone in November of this year. I need help to decipher the tables in the back of your TRI manual so to know how to use these on an install.”
RESPONSE
Although they seem onerous at first glance the wind tables are not too bad to navigate with a few clues.
If Oklahoma is considering the 115 MPH in November, we will assume they are going with the 2012 IBC/UBC and the tables in appendix C would apply. Since most tile roofs go on Gable/Hip roofs we would be looking at tables 9A (roof slopes 5.5:12< 6:12), or Table 9B (Roof Slopes 2.5:12<5.5:12, shown below) or table 9C (Roof Slopes 6:12< 12:12).
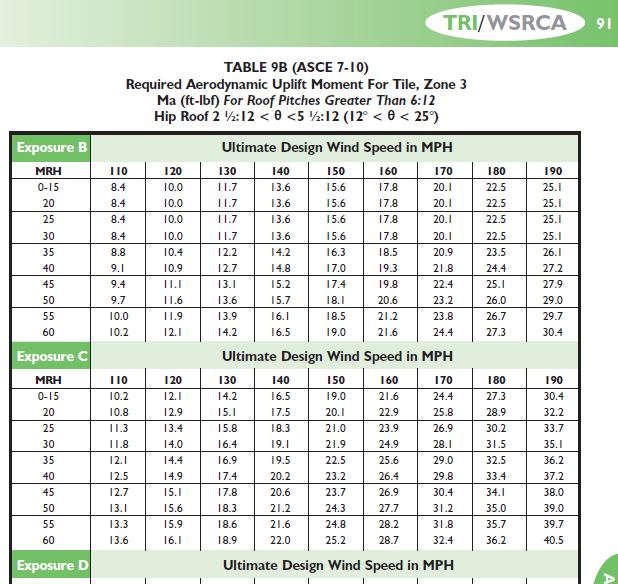
Table 9B
This will let us know what the wind uplift would be on the tiles. Since you are 115 MPH, you would use the 120 MPH column for exposure C (most used outside of coastal areas)
Example; 5:12 hip roof at 25 ft Mean roof height, exposure C is 13.4 ft-lbf of resistance (from table 9B)

Table 9B – Exposure C Example
Now we need to go to table 7 on page 85 (since Table II on page 95 only has the very high wind options that are above your 120).

Table 7 – page 85
Here we list all of the fastener options and their corresponding resistance. You need to select the tile profile. So lets say a flat tile on a batten on a 15/32” sheathing.
We need an option that will exceed the 13.4 so we will be looking at the 1-#8 screw at as a minimum with 25.6 in Table 7.
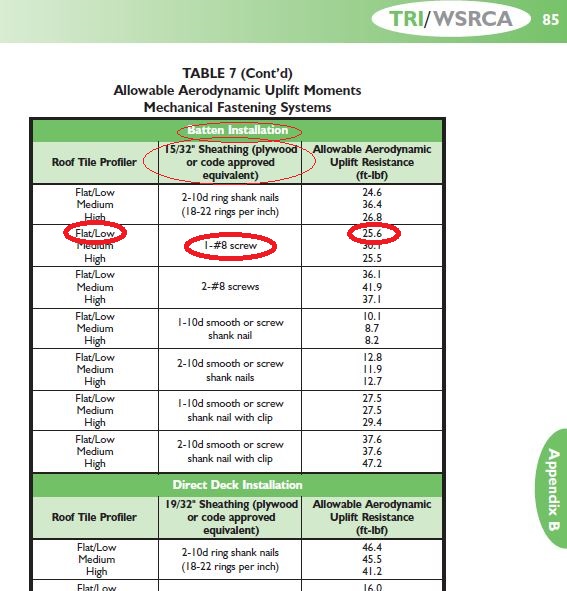
Table 7 Choices with Battens
If you were a direct deck application with a 15/32” sheathing, you could use the 2-10d smooth shank as a minimum with 20.2
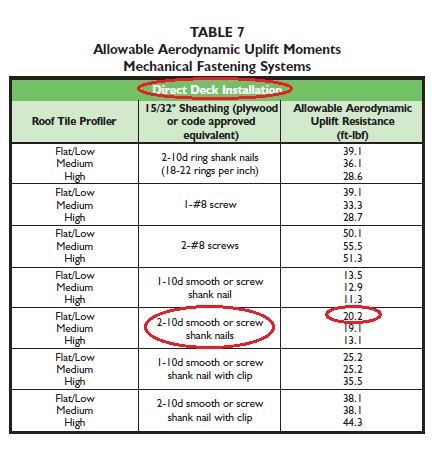
Table 7 – Direct Deck p.84